First time setup
When you open strimertül for the first time it will prompt you to start an onboarding procedure. The setup should be quite self-explanatory but in case you’re having trouble with it, this guide will break it down in a more exhaustive way.
# Onboarding prompt
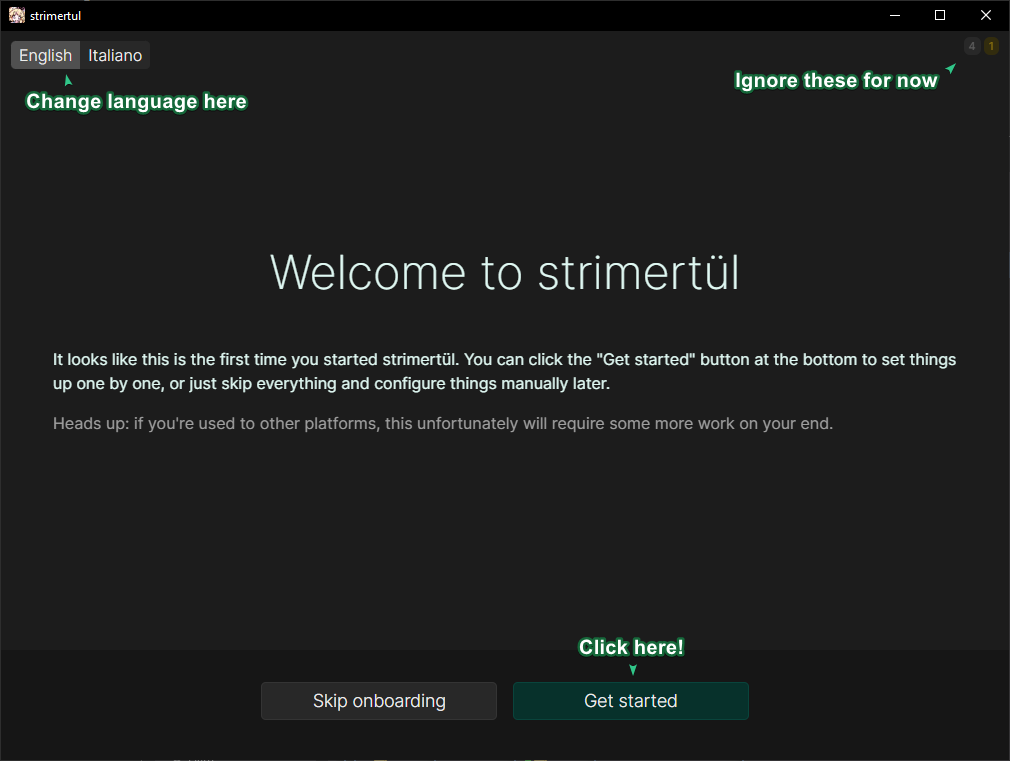
The starting screen for an unconfigured strimertul lets you choose wether to start or skip the onboarding procedure. Here you can also choose the language for the application (if your desired language is available). You can always change language later!
For the purpose of this guide, proceed through the onboarding by clicking “Get started”.
# Twitch application credentials
In order for strimertül to communicate with Twitch APIs, you will need to register it as an application on the Twitch Developers portal. This is because as an open source application that you run, there is no central strimertül and each instance requires to be registered by whoever controls it.
Note that to create an application you might be asked to enhance the security of your account, for example by enabling Two-Factor authentication.
To access the portal just click the link in the UI, it will open it in your default browser.
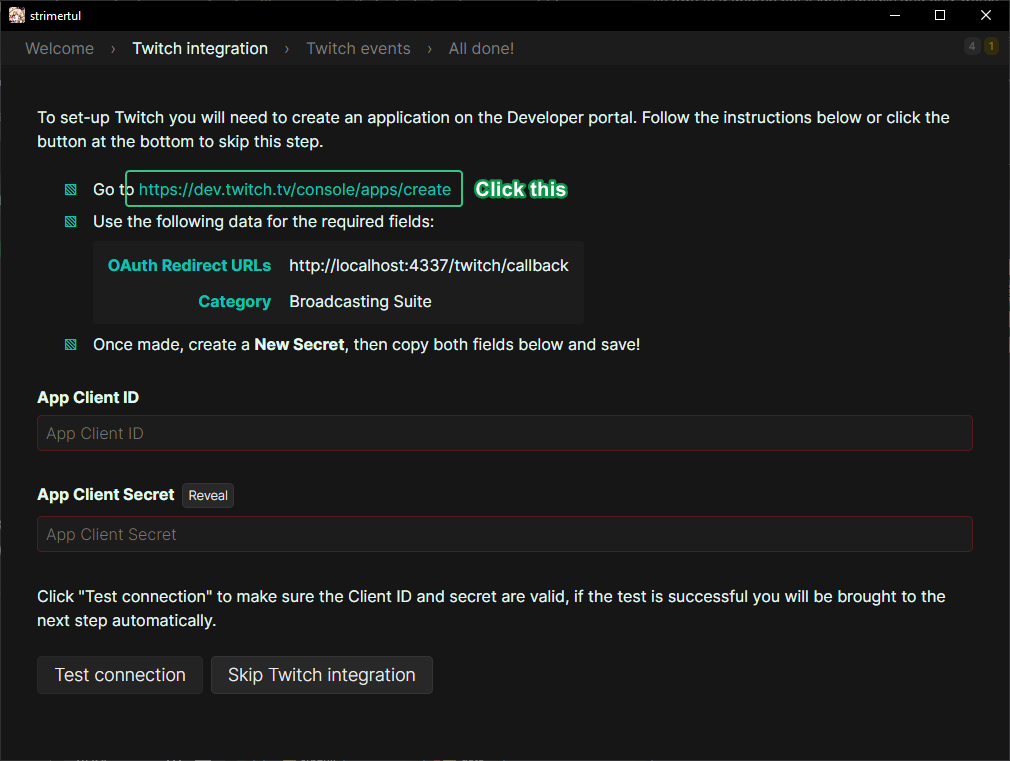
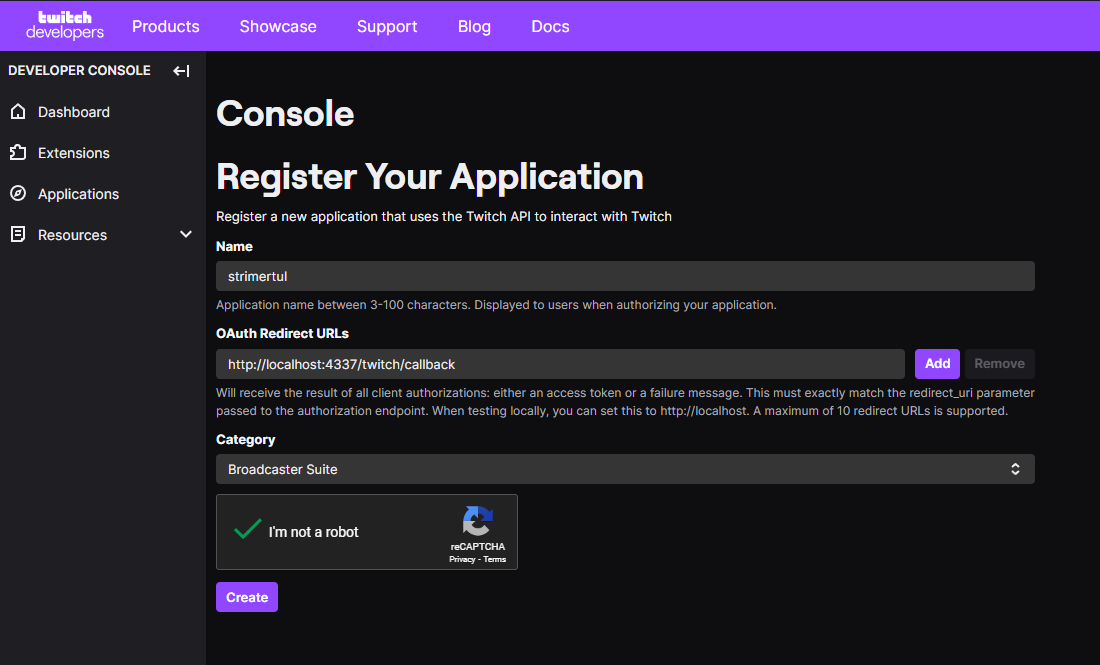
Once in the developer portal, fill out the info as specified in the user interface (i.e. OAuth redirect URL and Category), the name of the application is not important, so choose any that fits your liking.
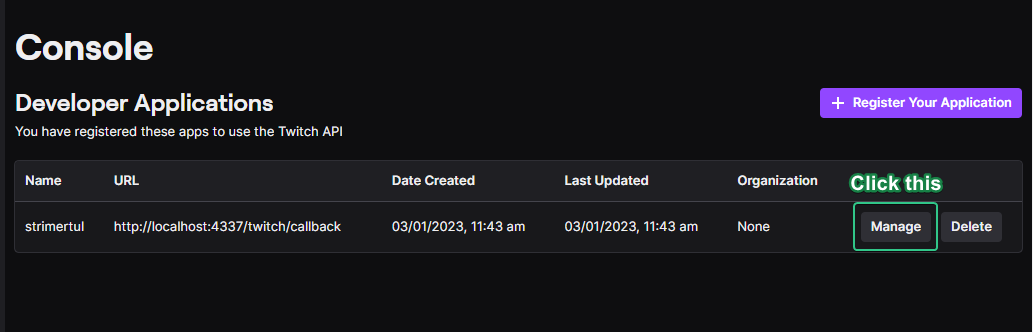
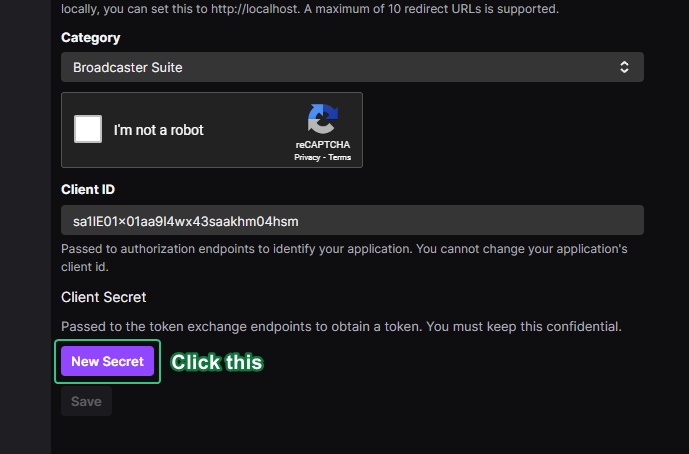
After you created your application, click the “Manage” button in the application list so you can get its credentials.
Scroll down to the bottom and click “New secret”. Unlike the Client ID, the generated secret will only be shown once so make sure to keep the page open until you are done with the configuration.
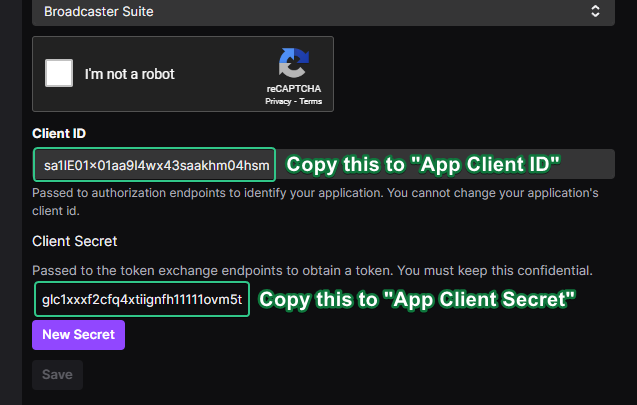
Once the secret has been generated and shown, copy over both Client ID and Client Secret to their respective text boxes in strimertül.
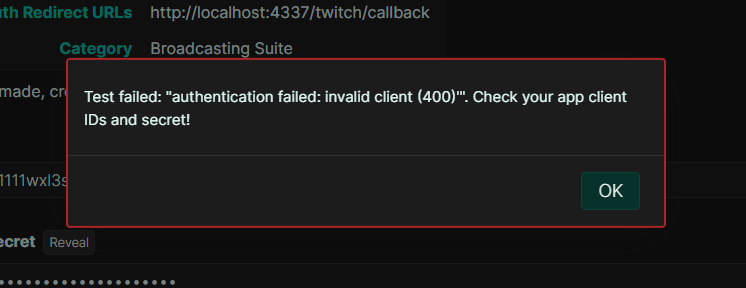
After all is copied, click “Test connection” to let strimertül use the provided credentials to check if they are working correctly. If you get an error screen like the following, double check your credentials.
If everything is valid, you will be automatically moved to the next step.
# Twitch user authentication
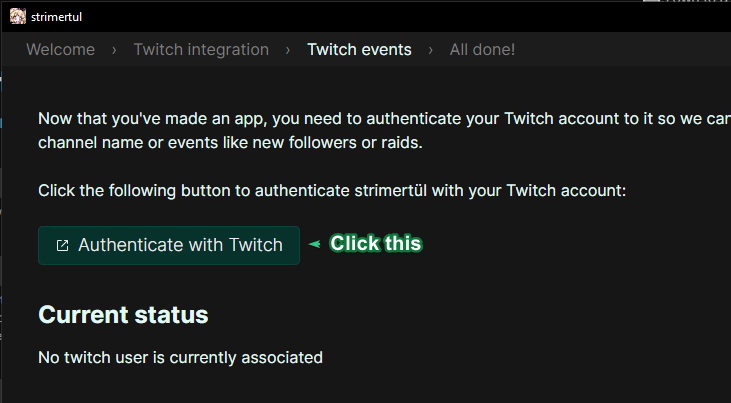
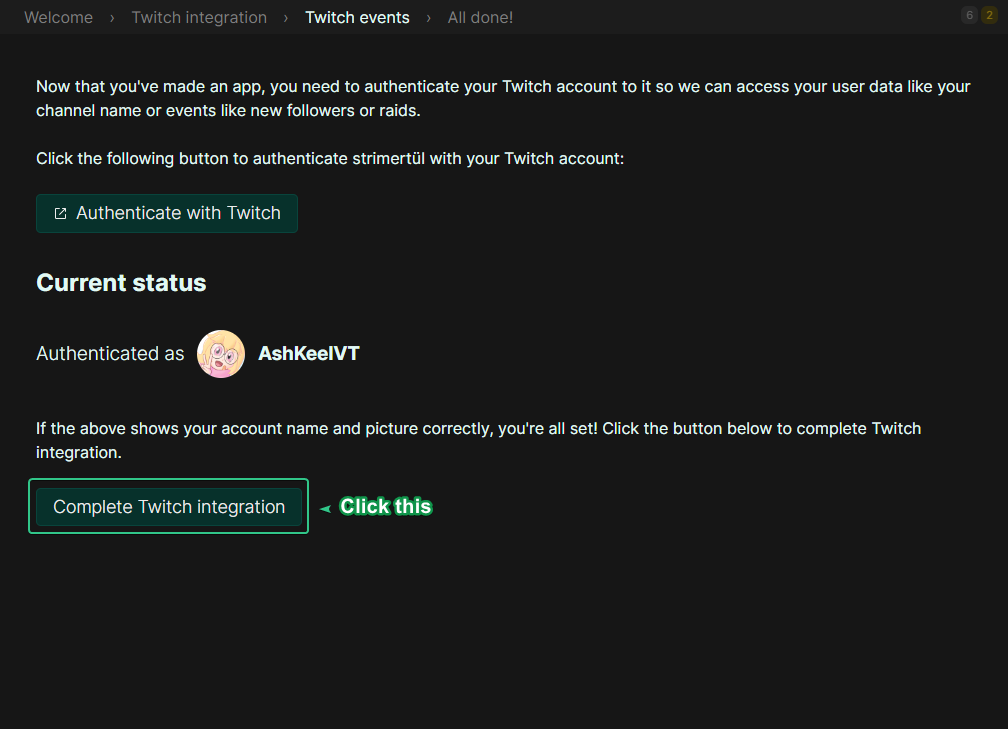
Now that you have registered strimertül as a Twitch application, you need to authenticate your user to it so it can access your stream info and events.
Click the “Authenticate with Twitch” to open the authentication flow in your default browser.
You will be brought on the Twitch authentication flow where you will see all the permissions strimertül asks for. This list is subject to change as Twitch changes APIs over time.
(FLASHBANG WARNING)
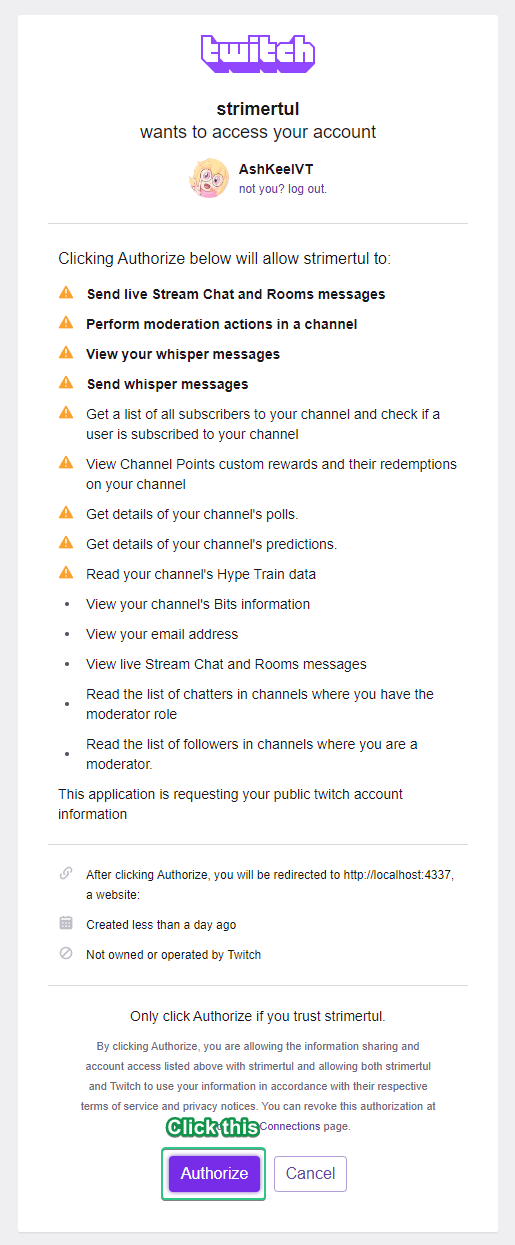
Once accepted, the page should either close down or give you a “All done, close me” message, at which point it’s safe to close.
Check that strimertül shows the user like so:
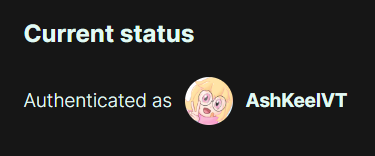
If not, repeat the authentication, otherwise finish up by clicking the button at the bottom.
# All done
You are all set! The final page just contains some links to reach out for issues or further clarifications. Click the “Complete onboarding” button to close the first time setup and play around with strimertül.
